

The overhead cabinet above the sink in our 25 foot Class C is 22 inches wide, 11 inches deep and 9 inches tall. I know that because I measured it with Ray's tape in the summer of 2025, right after a stack of rigid plastic bowls slid out onto the floor at a stop sign outside Bend. Nine inches of height sounds generous until you start stacking. A quart container is five inches tall, two of them are ten, and the moment you add a pitcher the door will not latch. So the pitcher moves to the counter. And the counter is the only clear place you have to set down a hot pan.
Rigid containers do not fail because they are badly made. They fail because they take up the same room full as they do empty, and in an RV galley the empty days outnumber the full ones by a wide margin. The fix is not another shelf. It is containers that stop being containers when there is nothing in them. We bought the Annaklin 8 pack collapsible silicone containers in the spring of 2025, the same week as the cookware set, and the change in that cabinet was not subtle. Eight containers across four sizes, plastic lids with four snap buckles and a silicone seal ring on each one. Pushed flat, the whole set takes the shelf space that two rigid quart containers used to claim.
Eight containers that go flat the moment they are empty
The Annaklin set is the reason that cabinet has two shelves instead of one. Four sizes, 192.4 fluid ounces between them, and a stack you can push down with one hand when the shelf needs to be a shelf again.
Amazon Check Today's Price on Amazon →Step 1: Measure the cabinet before you buy a single container
Get a tape measure and write three numbers on a sticky note: the width, the depth and the height of the cabinet you want back. Ours is the overhead above the sink, and it is the only overhead the galley has, so every inch is spoken for. Then measure your tallest standing stack of rigid containers exactly as it sits on the shelf today, including the lid. Ours was 10 and a half inches in a 9 inch cabinet, which is why that door never really latched and why the bowls were always the first thing to move when we hit a rough patch of asphalt.
That second number is the one people skip, and it is the one that tells you how much room a collapsible set can actually return. The largest container in the Annaklin set is listed at 11.02 inches long, 8.46 inches wide and 4.53 inches tall when it is open, and the listing says the collapsible design recovers up to 50 percent of the space. What that meant in our cabinet was simple. The same eight containers that filled the shelf when they were standing now sit flat enough that the coffee and the tea tin moved down onto the shelf above them. Nothing else changed. Same cabinet, same door, one more shelf.
While the tape is out, check the shelf itself. Cabinet shelves in a Class C are often a thin panel sitting on four plastic pins, and those pins work loose on washboard roads. If yours lifts out, take it out, lay a strip of non slip liner under it and press it back down before you load anything on top. That takes two minutes and it is the difference between a shelf and a pile on the floor.
Step 2: Empty it completely and sort by job, not by shape
Take every single thing out and put it on the dinette. All of it, including the container you are certain you use every day. Then sort by job instead of by shape, because shape is what got you into this mess. In an RV galley there are only about four jobs: leftovers going into the 6 cubic foot fridge, ingredients prepped ahead of a meal, lunches for a day at the lake, and dry goods that need to stay dry.
Be ruthless with the dry goods, because that is where the space goes. A lot of what fills an RV cabinet is packaging, not food. Half a bag of rice, a box of crackers with four crackers left in it, the flour you bought for one batch of pancakes. Those get decanted into the larger containers and the packaging goes into the recycling. If you will not use it in the next two weeks, it does not get a container at all, it gets left at the house in Salem.
The only things that stay rigid in our galley are the coffee canister and the salt box, because both have a lid that has to seal for months at a time and neither of us wants to test that with something flexible. Everything else collapses. Three nesting mixing bowls went home to the kitchen that first summer, along with a set of measuring cups I had been carrying for four years without using. I have not missed any of it.
One more pass before you put anything back. Hold each item up and ask whether you would buy it again today, at a campground, knowing what you know now. Anything that gets a shrug goes into the box for the house. That box is the most useful thing to carry on the first trip after a purge, because it keeps you honest about what you actually reach for.
Step 3: Give the collapsibles one shelf and keep the other one clear
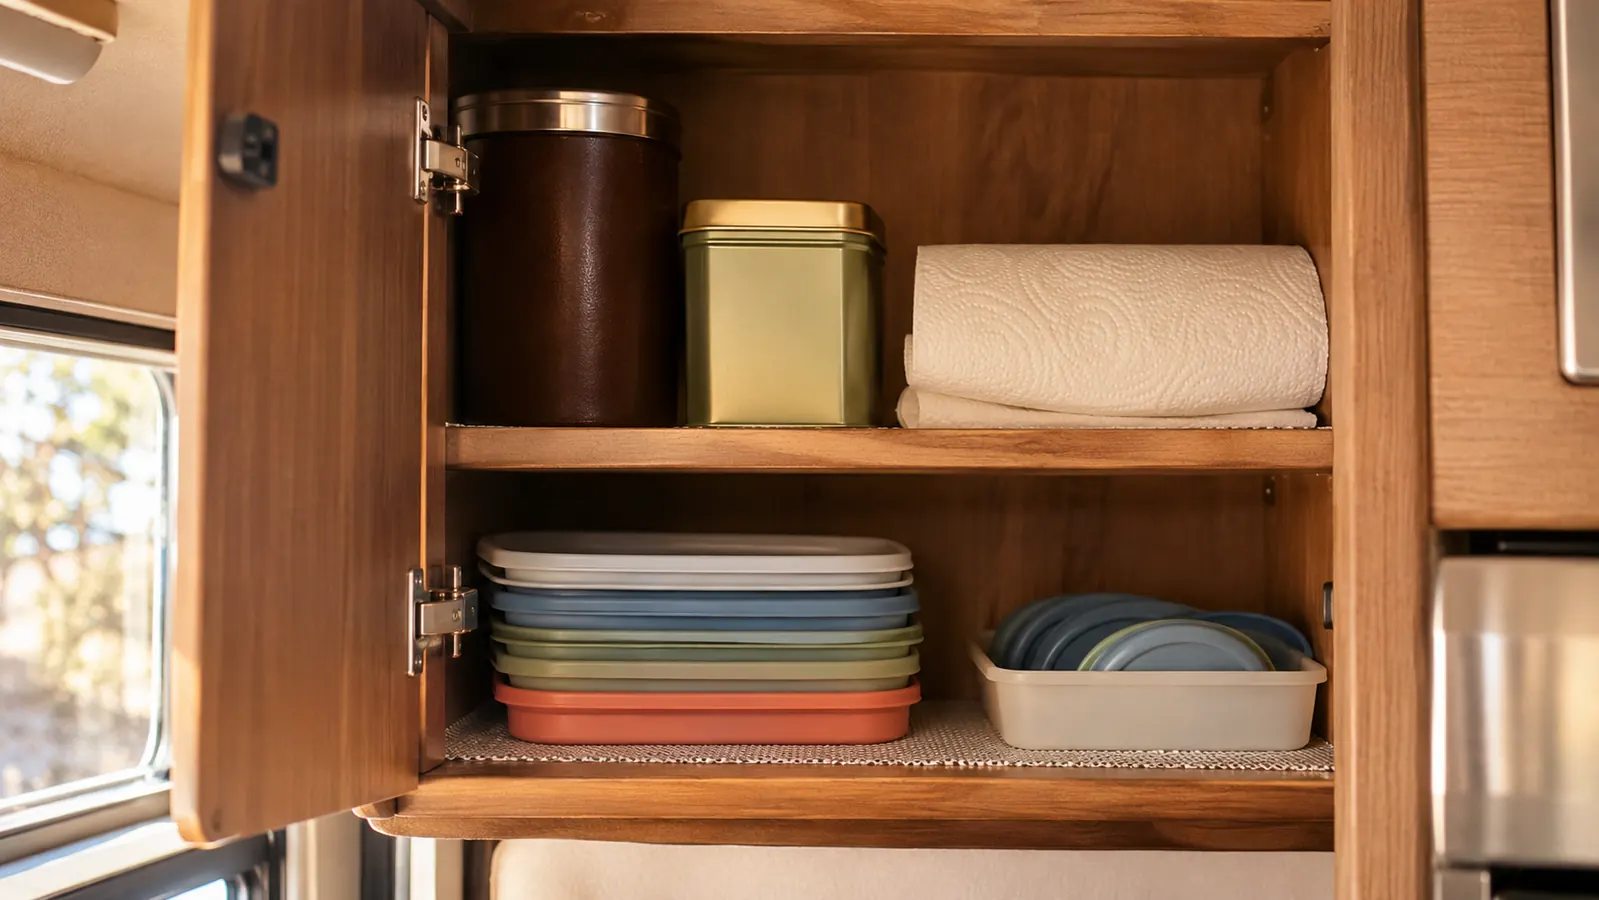
This is where the space comes back. The empty containers live flat on the bottom shelf, stacked one on top of another, and the lids do not stay on them. A container with a lid snapped down will still collapse, but not all the way, and I want the last half inch. The lids stack on their own in a short pile at the back corner, or in a shallow tray if you find one that fits the shelf depth.
In our cabinet all eight containers pushed flat take less height than the four rigid containers they replaced, and the lids together take about as much room as a folded dish towel. That leaves the top half of the cabinet for light things: paper towels folded in half, the tea tin, the coffee. Heavy low and light high is the rule, and it is not fussiness. A full 40.5 ounce container of chili base coming out of an overhead cabinet at a stop sign is a genuinely bad afternoon.
Do not put them away damp. Silicone that goes into a closed cabinet with water still in the fold will come out smelling like the inside of a cooler, and soap does not fix that quickly. I dry them open on the drainboard, then push them down, then stack. On a travel morning that means they get pushed down last, after the breakfast dishes, not first.
Stack them with the biggest pieces on the bottom. A wide base keeps the whole stack from leaning into the door when the rig rocks, and the smaller ones on top are the ones you pull out most often anyway.
Eight containers, 192.4 fluid ounces between them, and pushed flat the whole set took less shelf room than the four rigid containers it replaced.
Step 4: Match the four sizes to the four jobs
Four sizes sounds like a marketing decision until you are standing in front of a 6 cubic foot fridge trying to fit half a meatloaf. The sizes in this set run 11.8, 16.9, 27 and 40.5 ounces, and the pieces come in both rectangular and round shapes. In a small fridge it is the rectangles that earn their keep, because they line up against the wall and against each other with no dead air between them.
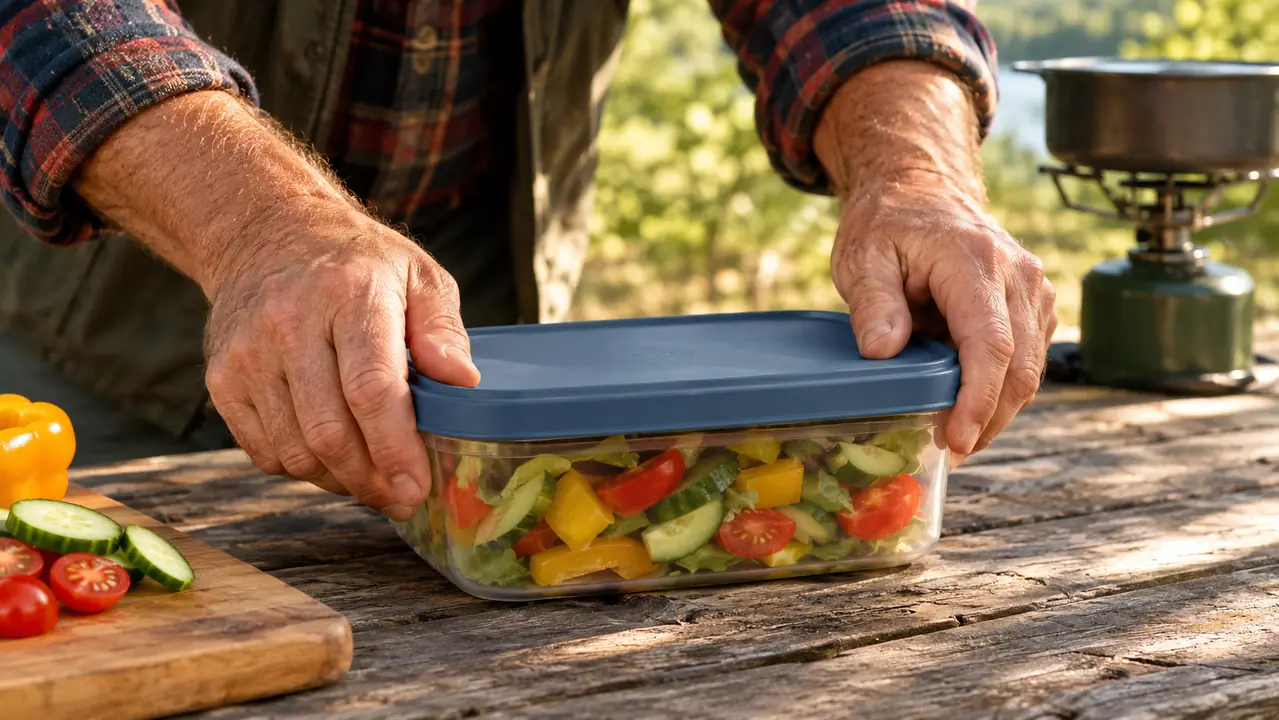
What we settled on after a couple of months: the 11.8 ounce containers for cut vegetables, a single serving of rice, and the last of the blueberries. The 16.9 for leftovers for two, which is most nights. The 27 for a batch of chili base or a marinade. The 40.5 for a whole meal, or for the dry goods when we are traveling with rice and oats. If I am prepping ahead for a cookout, the 27s and the 40.5s are the ones that go out to the picnic table with the portable stove.
There is a second, quieter use I did not expect. The small ones hold a sandwich and an apple for a day at the lake, and because the lid buckles down on all four sides, lunch goes into a tote bag and comes home without decorating the inside of the truck. That is worth more to me than the cabinet, honestly.
If two people dig in the same cabinet, label the lids. Ray and I were both guilty of grabbing the biggest container for a half cup of something, and that is how a set of eight ends up with all eight in the fridge at once and nothing on the shelf. A strip of masking tape and a pen fixes it in an afternoon.
Step 5: Keep it working, which means the buckles, the ring and the water
Four snap buckles per lid, plus the silicone seal ring. Close three and leave one and soup will find the rug, usually on a mountain grade. I press the lid down in the middle first so the ring seats, then I close all four buckles, and I check them with a thumb before the container goes into the fridge or into a tote. It takes four seconds. It is cheaper than scrubbing a fridge shelf at a rest stop.
The listing gives a temperature range of -4 to 428 degrees Fahrenheit and says the containers are microwave safe, freezer safe, dishwasher safe and BPA free. I use them in the microwave for rewarming and in the freezer for batch cooking, and I have not pushed the top of that range, because I have a cast iron Dutch oven for anything that needs real heat. On travel days I hand wash them in the sink with a cup of hot water and a drop of soap, which matters when the gray tank is nearly full and water is the thing you are counting. Silicone flexes, so you can turn a container almost inside out and get a corner clean without a brush.
Two honest downsides. Tomato sauce will leave a faint stain in the silicone. Ours has a pale orange ghost in one 27 ounce container from a batch of pasta sauce in 2025 and it has not faded. It is cosmetic and it does not affect the lid, but if a marked container bothers you, keep one back for red things. And when they are full they do not stack as neatly as rigid containers, because full silicone has some give. So the full ones live in the fridge and the empty ones live in the cabinet. That is the whole system, and it works precisely because the empty ones take up almost nothing.
What I Liked
- Pushed flat, all eight take less shelf height than the rigid containers they replaced
- Four sizes (11.8, 16.9, 27 and 40.5 ounces) across eight pieces, in rectangular and round shapes
- Four snap buckles and a silicone seal ring hold leftovers through a day of driving
- Microwave, freezer and dishwasher safe, and BPA free
- The rectangles line up in a small fridge with no wasted air between them
Where It Falls Short
- Every lid needs all four buckles pressed or a liquid will find a way out
- Tomato based sauce can leave a faint permanent stain in the silicone
- Full containers do not stack as tidily as rigid ones, so the full and empty sets have to live in different places
What Else Helps
Three other things made that cabinet work, and none of them took more than a few minutes. The first is the cookware. We moved to a detachable handle set in the spring of 2025, and the handles come off, so the pans nest into the one narrow drawer instead of standing on long handles and blocking the drawer from closing. The second is a thin rubber shelf liner cut to fit the cabinet, which stops the flat stacks from sliding when we turn onto a ramp. The third is a rule about weight. Nothing heavy goes in the overhead. The 5 quart cast iron lives in a padded bag on the floor of the outside storage bay, low and centered, because at 13 pounds it is the heaviest thing we carry for cooking and this rig has a weight limit like every other one on the road.
What I would not do is buy an organizer to hold the collapsible containers. The entire point is that they collapse, and a rigid bin with dividers inside the cabinet eats the space you just recovered. A folded dish towel between the lid stack and the door is enough padding, and a shallow tray for the lids keeps them from migrating to the back of the shelf where you cannot reach them without a flashlight.
One thing I would add if you have room in the bay: a second small set that lives with the outside cooking gear. The griddle and the portable stove both ride in the outside storage, and it is easier to carry prepped food out in a container than to make three trips back into the galley. We use the round pieces for that, since they drop into a tote bag more easily than the rectangles.
The shelf you get back is the whole point
Start with the tape measure, then let the containers do the rest. Eight pieces, four sizes, and a stack that goes down to almost nothing when the cabinet needs to be a cabinet again.
Amazon Check Today's Price on Amazon →